


Have you noticed that your epoxy resin work is opaque? Do the edges lack the same clarity as the surface? Here’s how to achieve consistency by polishing the epoxy resin, quickly, easily, and achieving amazing results:
Any synthetic resin surface, once hardened, can be polished. Wooden boards, artistic creations, floors, repaired objects, or furniture refurbished with epoxy resin are suitable for this process as long as it is done with care and precision. In general, polishing requires three phases; flattening, progressive honing, and buffing/polishing.
PHASE 1 – FLATTENING
– The two keys to flattening are the rigidity of the first/coarsest abrasive and the need to continue flattening until the entire surface is uniform
– This is often the longest step, and requires careful inspection before continuing to the honing phase
– Do not overlap the edges with the abrasive pad more than 15% of the width of the pad or you will round off the surface, making it difficult to hone later
Flattening the epoxy resin must be done wet using:
– Water source
– Waterproof sandpaper
– Orbital sander or hand sanding pad
The movements during wet sanding, by hand or with an orbital sander, must be precise and circular. The goal of the first step must be a flat surface. You cannot achieve flatness after the initial step.
PHASE 2 – PROGRESSIVE HONING
The key in this phase is to fully remove the scratch pattern from each previous step by working the entire surface for the same length of time, with the same quantity of water and consistent pressure. Stubborn grinding marks from the flattening step must be fully removed before moving to the second honing step.
Honing the epoxy resin must be done wet using:
– Water source
– Waterproof sandpaper
– Orbital sander or hand sanding pad
– Abrasive discs
The movements during wet sanding, by hand or with an orbital sander, must be precise and circular through each step from coarse 120 to 3000 grit.
How to proceed:
– Moisten or dip the sandpaper or pad in water and sand with light pressure until a slurry is visible.
– Remove the slurry with a squeegee or cloth to inspect, and rewet the sandpaper between each sanding step and the next.
– Observe the dry surface after each step. If any non-uniform random scratches are visible do not move on to the next grit. Repeat the last step.
– The abrasive pattern is refined with each step. Any random scratches must be removed because later it will no longer be possible.
– Repeat the honing process using each graduation in the series. Do not skip steps.
– Hone the edges with much less pressure than the face, keeping the abrasive contact patch perfectly flat.
– Edges that are rounded in the early steps will be impossible to fix in later steps.
– Remove the slurry from the surface after each step and inspect for random scratches.
If using silicone molds, the surface will be smooth after casting, meaning it may be possible to skip honing and go to the polishing step.
PHASE 3 – POLISHING/BUFFING OF THE EPOXY RESIN
Do you want a perfectly polished surface? Here are some practical tips for the result you are looking for:
– Use a quality polishing paste. Some pastes for wood are suitable for this procedure.
– Light pressure and frequent inspection are needed to avoid burning.
– If possible, use an electric buffer with dedicated pads, running at the recommended rpms.
– Avoid high speed angle grinders because they lack precision and risk heating the surface too much.
– In the case of small, hand-held creations, it is possible to use a drill equipped with polishing pads.
– Based on manufacturer recommendations use sponges, discs or, for very small objects, perhaps using polishing balls for certain shapes.
POLISH/BUFF THE EPOXY RESIN WITH THE DRILL
– With the pad driver in the chuck, apply polishing paste to the polishing pad. Gently hold the part to be polished against the wheel.
– Perform uniform movements until achieving the desired shine, paying particular attention to the corners.
– Stop and inspect frequently
– Repeat as necessary, applying smaller amounts of paste.
POLISH/BUFF WITH A DUAL-ACTION POLISHING MACHINE
The polishing machine is ideal for large surfaces such as tables and floors, because it allows elliptical movements, essential for an optimal result. We recommend this tool especially for beginners, because it is very easy to use.
HAND POLISH//BUFF
The polishing of the epoxy resin by hand allows greater control and is recommend for very small objects. You need:
– Colorless polishing paste.
– Water feed
– Linen or cotton cloth
– Stiff and rectangular backing pad, perhaps even a block of wood.
How to proceed:
– Put a little colorless polishing paste on the cloth and moisten it with water.
– Rub the cloth in a circular way and with light pressure on the creation. Don’t be in a hurry.
– For corners and flat surfaces, wrap the wooden block with the cloth.
– During polishing, remove residue left by the colorless polishing paste several times with a clean cloth in order to control the degree of brilliance to be obtained.
You will be “blinded” by the brilliant beauty of your epoxy resin creation!
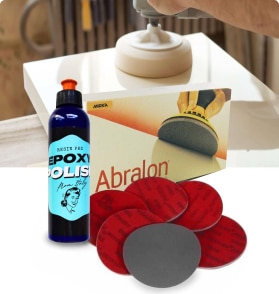
Resin Polishing Kit
New line of polishing products SPECIFICALLY for the plastic and resins industry.
starting from $23.70

